https://westgold.com/
Article content
"Making bread is surprisingly simple and so rewarding – at it's core it only needs four ingredients."
For most of us making bread seems a little daunting so with the help of the amazing Kearin (from Wellington bakehouse) we’ve pulled together some of the best tips to get you started - you'll be hooked on homemade bread in no time!
What makes yeast happy?
Yeast feeds on flour – it breaks down the starches in the flour into sugars and doesn't need extra food but a little bit of sugar at the beginning can give yeast a kick-start.
Yeast needs moisture – its best to use slightly warm water or milk when you make your bread to encourage yeast to get active and foamy.
Yeast needs warmth (but not too much) – temperatures over 45 degrees will kill yeast. When you’re trying to find a warm place to for your mixture rise, ideally the temperature needs to be between 20 and 25 degrees and not more than 30C. If you’re using an oven to do this make sure you can keep the temperature at 30 degrees or less as some ovens only go to 50 degrees as the lowest option.
Other ways to ensure your mixture stays warm is to use a glass or ceramic bowl. While plastic and metal are still fine, glass and ceramic bowls insulate better and keep their warmth for longer. Another great tip is to place a warm wheat pack under your bowl.
Types of yeast:
You might notice that recipes will call for different types of yeast. Don’t worry, in NZ all commercial yeast is the same strain (sourdough is another story!). A good all purpose option is active dried yeast that you can find in the baking aisle of the supermarket and it looks like little balls. Keep your yeast in the fridge and make sure it's well within it's expiry date for the best results.
Some recipes will call for fresh yeast – this a moist cake that feels like plasticine and is what dried yeast is before it's dried out. You can use either fresh or dried just be careful when converting the amounts.
A good general rule of thumb to follow is for every 500g flour you will need 1.5 teaspoons of active dried yeast or 15 grams of fresh yeast. You may find recipes calling for a lot more yeast than this and while it will make your dough rise faster it can affect the flavour and isn't necessary for a good result.
There is another kind of yeast called Surebake available in supermarkets - this type of yeast has dough improvers added like vitamin C. You will still achieve an amazing dough without the extras but if you use Surebake remember that you will need about twice as much because only about half the volume is actually yeast.
Remember too that great bread flavour requires a balance of yeast and salt - no salt and your bread will taste yeasty and a little bitter, too much salt and your dough can struggle to rise as well as having an unpleasant flavour - around 10 grams (1 and a half teaspoons) per 500 grams of flour is a good amount.
Types of flour:
In New Zealand bread flour is called high grade flour – this is the same as "strong" flour or "bread" flour in recipes. It has a higher percentage of gluten at around 11-12% compared to normal flour which typically has around 9-10%. You can still use normal flour; however you will have to knead it for longer and your bread may not have as much loft.
High grade flour also absorbs more liquid so try to use the type of flour specified in a recipe until you are confident making alterations.
What equipment do you need?
The best news is that you only need 5 things!
A bowl (ideally ceramic/glass is best), a set of scales, a plastic scraper (or your hands!), shower cap or honey wrap to cover the dough, and a jug for your liquids.
You can use a mixer to make bread but it will only save you a few minutes of kneading time and it can easily over mix your dough, so you need to pay careful attention to it.
Mixing and kneading by hand is the best because not only are you developing your technique but you really get to know what the dough feels like - and you get to work out your frustrations on the dough!
Don’t be afraid/ashamed to use a breadmaker – anything that gets you one step closer to making bread yourself is great. You can always use your breadmaker to mix your dough, then once it's risen, take it out of the breadmaker and shape into a loaf/buns yourself and bake in the oven
What ingredients do I need?
Making bread is surprisingly simple and so rewarding – at it's core it only needs 4 ingredients:
Water or milk, flour, yeast, and salt. You can add a little sugar if needed to kickstart the yeast activating. To make richer and more varied breads you can add eggs, butter, sweeteners, flavourings and mix-ins - but it all builds on a simple base.
Kneading:
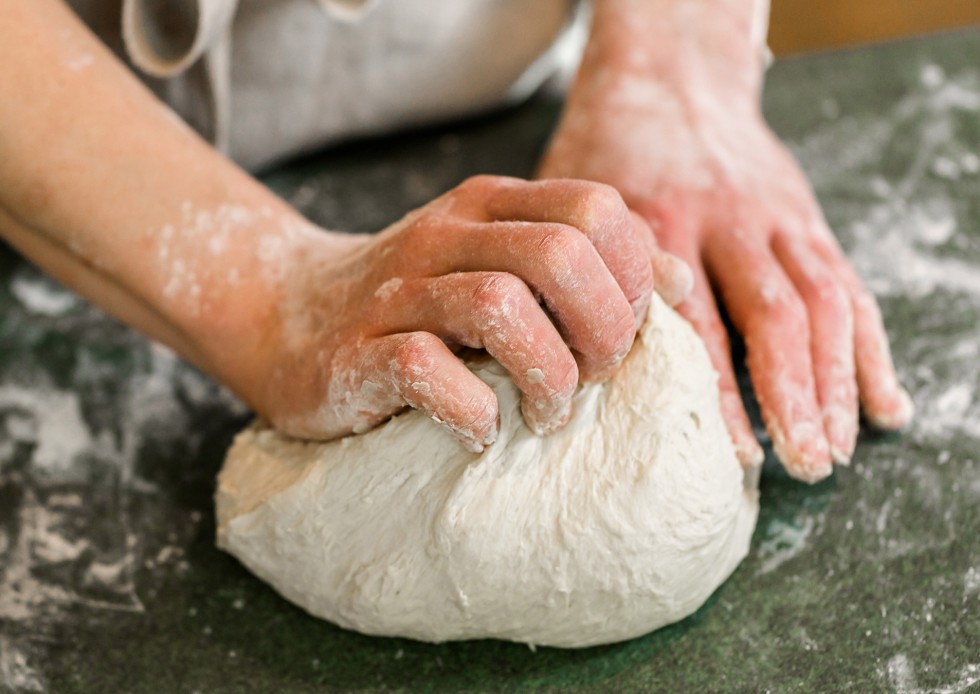
Kneading is crucial for bread making. It’s the kneading process that stretches and develops the gluten so it gets strong and provides structure to bread.
By kneading, you are strengthening the dough so it becomes strong enough to hold the air bubbles produced by the yeast as it rises. If the air bubbles are trapped well, your dough will rise well. Dough that hasn't been kneaded enough will still rise but it won't get as tall and will start to slump as it proves.
You will know if your kneading is working if the dough is getting dryer, smoother and if it stops sticking to the bench. While you knead the flour is absorbing liquid and the dough is getting stronger and smoother.
It can be hard to over knead by hand which is one of the reasons we recommend giving bread making by hand a go.
You can tell a dough has been over kneaded if it loses its structure, gets sticky and starts to puddle out. It can be a good idea to do a few practice runs and deliberately over knead just so you know what over kneaded dough feels like.
Proving:
Proving is the process of testing that the yeast in your dough is alive and gives it time to live and multiply.
Prove your dough by leaving it in a bowl somewhere warm – typically for about an hour and in that time it should double in size. If it starts to slump your dough has been over proved. This is because the air in the dough has strained the gluten too much causing the dough to lose its shape.
A little bit of over proving is ok – the texture won’t be the same but it will still taste fine. Take more care with proving once you have shaped your loaves or rolls as they will be baked without any more handling.
If you are making round bread rolls and they are overproved – you can sometimes rescue the by rolling each one again and re-shaping them. For yeast breads (rather than sourdough) the length of time your dough has fermented for is short enough that an extra proofing won't be a problem.
Tips for a light, fluffy bun:
Whatever you do, don’t add extra flour. Just be patient as it will come together.
Make sure you knead properly
You can use slightly more liquid than you’re used to by adding 2 more tablespoons of water or milk and testing the results. The softness of a bun's crumb is linked to the amount of moisture in dough.
Make sure you prove well and wait until it rises to double; if you bake it too early you won’t have enough air bubbles inside to be soft and light.
Make sure you check out Kearin’s blog over at https://wellingtonbakehouse.com/


 Previous blog


